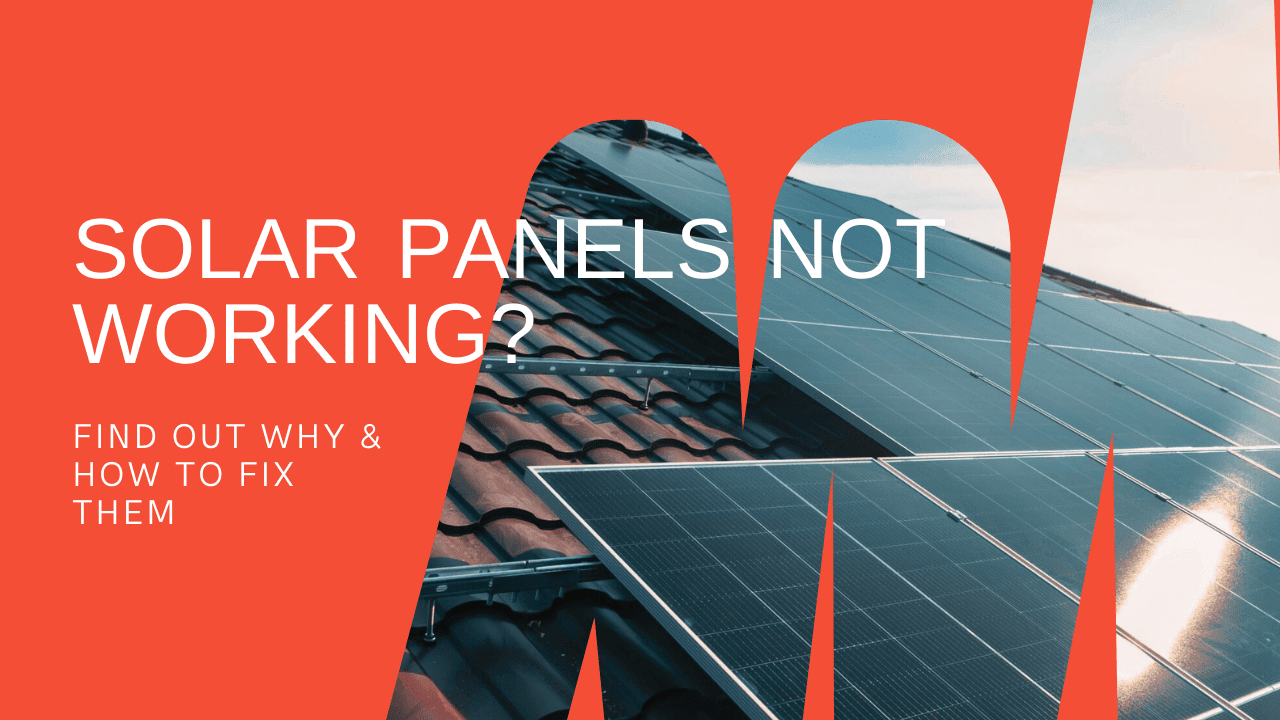
Imagine you're miles from the nearest outlet, basking in the sun, phone in hand, ready to capture that perfect landscape photo... only to see the dreaded low battery warning. You reach for your solar phone charger, confident you're prepared. But then... nothing. No charge. What happened?
It's frustrating when your supposedly eco-friendly gadget lets you down, especially when you're relying on it to keep you connected. The promise of harnessing the sun's energy to power your devices is appealing, but the reality can sometimes be a bit...dim. Dealing with slow charging, devices that refuse to charge altogether, or chargers that seem to work one day and not the next can leave you feeling more stressed than self-sufficient.
This article aims to shed some light (pun intended!) on the most common problems encountered with solar phone chargers and, more importantly, provide practical solutions to get them working reliably. We'll explore everything from proper usage and maintenance to troubleshooting specific issues, ensuring you can actually depend on your solar charger when you need it most.
So, let's dive in! We'll cover issues like insufficient sunlight, incorrect charging techniques, and faulty equipment, giving you the knowledge and tools to maximize your solar charger's effectiveness. We'll also touch upon topics like panel cleaning, cable integrity, and battery health, all essential for optimal performance. By understanding these aspects, you can avoid common pitfalls and enjoy the benefits of sustainable charging on your adventures or in everyday life. We aim to empower you with the insights needed to resolve solar charger issues and ensure that your devices stay powered up reliably, wherever you are.
Insufficient Sunlight: The Prime Suspect
I remember once, hiking in the Grand Canyon, armed with my brand-new solar charger and a naive belief that the desert sun would instantly solve all my battery woes. I laid the charger out in what I thought was prime sunlight, confidently snapping photos and enjoying the scenery. Hours later, my phone was practically begging for juice. I realized the issue wasn't the charger itself, but the patchy sunlight filtering through the canyon walls and the angle at which the charger was placed. Understanding the sun's trajectory and positioning the panels for optimal exposure is crucial. A solar charger, regardless of its quality, can only work with the amount of sunlight it receives. Clouds, shade, even the angle of the sun in the sky, all drastically impact its efficiency. To remedy this, consistently reposition your solar charger throughout the day to follow the sun's path. Consider using a small stand or prop to angle the panels directly towards the sun. On cloudy days, accept that charging will be significantly slower or even impossible. Some chargers have built-in indicators to show the sunlight intensity, which can be incredibly helpful. Choosing a location with unobstructed access to the sun for the longest possible duration is key to achieving a successful charge. And remember, even a seemingly sunny day can have subtle variations in sunlight intensity that affect your charger's performance. This attention to detail can be the difference between a fully charged phone and a frustrating experience.
Incorrect Charging Techniques
Often, the problem isn't the solar charger itself, but how it's being used. Many people mistakenly believe that simply plugging their phone into the charger and leaving it in the sun will magically solve their battery problems. However, this can actually damage your phone's battery! Overheating is a major concern. Direct sunlight can cause your phone and the charger to overheat, leading to reduced battery life and even permanent damage. Always keep your phone in the shade while it's charging, even if the charger is in direct sunlight. Also, understand the charging specifications of both your phone and the charger. Using a charger with an incorrect voltage or amperage can lead to slow charging or even damage. Modern phones have sophisticated charging circuits that regulate the flow of electricity, but it's still essential to use a compatible charger. Another common mistake is interrupting the charging process frequently. Constantly plugging and unplugging your phone can negatively impact the charging cycle and reduce the overall efficiency. Allow your phone to charge continuously for a reasonable amount of time to maximize the charge. Finally, check the charging cable. A damaged or low-quality cable can significantly reduce the charging speed. Try using a different cable to see if it makes a difference. By following these simple charging techniques, you can greatly improve the performance and longevity of both your solar charger and your phone's battery.
Faulty Equipment: When to Suspect a Defect
While user error is a common culprit, sometimes the problem truly lies within the solar charger itself. Determining whether your charger is genuinely faulty can be tricky, but there are some telltale signs. First, inspect the solar panels for any visible damage. Cracks, scratches, or discoloration can significantly reduce their efficiency. Next, check the wiring and connectors for any signs of wear and tear. Loose connections or frayed wires can interrupt the flow of electricity. Use a multimeter to test the voltage and amperage output of the solar panels under direct sunlight. Compare the readings to the manufacturer's specifications. If the output is significantly lower than expected, the panels may be degraded or defective. Another common issue is a faulty charging circuit. Many solar chargers have built-in circuits to regulate the charging process and protect your devices from overcharging. If this circuit malfunctions, it can prevent the charger from working properly. Unfortunately, repairing these circuits can be challenging and often requires specialized knowledge. If you suspect a faulty circuit, contact the manufacturer or a qualified technician for assistance. Finally, consider the age of your solar charger. Like all electronic devices, solar chargers have a limited lifespan. Over time, the solar panels and internal components can degrade, leading to reduced performance. If your charger is several years old, it may simply be time to replace it. By carefully inspecting your solar charger and testing its output, you can determine whether it's truly faulty and take appropriate action.
Panel Cleaning and Maintenance
Just like any other surface exposed to the elements, solar panels can accumulate dirt, dust, and grime, which significantly reduces their efficiency. Think of it like trying to read a book through a dirty window – the light simply can't get through as effectively. Regular cleaning is essential to keep your solar charger performing at its best. The good news is that cleaning solar panels is relatively simple. Use a soft cloth or brush and a mild soap and water solution. Avoid using harsh chemicals or abrasive cleaners, as these can damage the panels. Rinse the panels thoroughly with clean water to remove any soap residue. It's best to clean your solar charger on a cloudy day or in the early morning or late evening to avoid overheating the panels. Inspect the panels for any scratches or cracks while you're cleaning them. Small scratches may not significantly affect performance, but larger cracks can reduce efficiency and potentially damage the panels. In addition to cleaning, proper storage is also crucial. When you're not using your solar charger, store it in a cool, dry place away from direct sunlight and extreme temperatures. This will help to prolong its lifespan and prevent damage to the internal components. By following these simple cleaning and maintenance tips, you can ensure that your solar charger continues to provide reliable power for years to come. A little bit of care can go a long way in maximizing its performance and extending its lifespan.
Cable Integrity: A Hidden Weak Point
Often overlooked, the charging cable is a crucial link in the solar charging chain. A damaged or low-quality cable can significantly reduce the charging speed or even prevent your device from charging altogether. Think of it like a garden hose with a kink in it – the water flow is restricted. Inspect the cable for any signs of wear and tear, such as fraying, cracks, or exposed wires. Pay particular attention to the connectors at each end of the cable, as these are often the most vulnerable points. Test the cable with another device to see if it works properly. If the cable is faulty, replace it with a high-quality cable that is specifically designed for charging your device. Consider using a cable with thicker gauge wires, as these can carry more current and provide faster charging. Avoid using excessively long cables, as these can also reduce the charging speed. A shorter cable will generally provide a more efficient charge. When storing your solar charger, be sure to coil the cable loosely to prevent it from getting tangled or damaged. Avoid bending the cable sharply, as this can cause the wires to break. By paying attention to the integrity of your charging cable, you can ensure that your solar charger provides the fastest and most reliable charge possible. A small investment in a good quality cable can make a big difference in performance.
Battery Health: Understanding Your Device's Needs
Your phone's battery health plays a significant role in how effectively your solar charger can power it. A battery that's already degraded or damaged will not charge as efficiently, regardless of how much sunlight your solar charger is receiving. Understanding the basics of battery health can help you optimize your charging experience. Lithium-ion batteries, commonly used in smartphones, degrade over time, regardless of how you use them. Each charging cycle reduces the battery's capacity slightly. Avoid fully discharging your phone's battery regularly, as this can accelerate the degradation process. It's better to keep your battery charged between 20% and 80% for optimal lifespan. Overheating is a major enemy of lithium-ion batteries. Direct sunlight or excessive heat can damage the battery and reduce its capacity. Always keep your phone in the shade while it's charging, especially when using a solar charger. Check your phone's battery health regularly using the built-in tools in your operating system or third-party apps. These tools can provide information about the battery's capacity, temperature, and charging cycles. If your battery health is significantly degraded, consider replacing it. A new battery will charge much more efficiently and provide longer usage time. By understanding and managing your phone's battery health, you can maximize the effectiveness of your solar charger and extend the lifespan of your device. A healthy battery is a happy battery, and a happy battery charges faster and lasts longer.
Tips for Maximizing Solar Charging Efficiency
Optimizing Angle and Positioning
One of the most crucial aspects of solar charging is the angle and positioning of the solar panels. To maximize efficiency, you need to ensure that the panels are receiving direct sunlight at an optimal angle. The ideal angle depends on your location, the time of year, and the time of day. As a general rule, aim for an angle that is perpendicular to the sun's rays. This will allow the panels to absorb the maximum amount of sunlight. Use a stand or prop to adjust the angle of the panels as the sun moves across the sky. Reposition the panels every few hours to maintain optimal exposure. Consider using a solar tracking device that automatically adjusts the angle of the panels throughout the day. These devices can significantly increase the amount of sunlight absorbed and improve charging efficiency. Be mindful of shadows cast by trees, buildings, or other objects. Even a small amount of shade can significantly reduce the amount of sunlight reaching the panels. Position your solar charger in a location where it will receive direct sunlight for the longest possible duration. Use a compass and a sun chart to determine the best direction to face your solar charger. Experiment with different angles and positions to find what works best in your specific location. By paying close attention to the angle and positioning of your solar panels, you can significantly improve the efficiency of your solar charger and ensure that your devices are charging as quickly as possible. A little bit of effort in this area can make a big difference in performance.
Fun Facts About Solar Phone Chargers
Did you know that the first solar cell was invented way back in 1883 by Charles Fritts? While it wasn't powering phones back then, it paved the way for the technology we use today! Solar phone chargers have come a long way, with modern versions being significantly more efficient and portable. Many solar chargers use monocrystalline silicon, which is more efficient than polycrystalline silicon but also more expensive. The efficiency of solar panels is measured by the percentage of sunlight that is converted into electricity. The best solar panels can achieve efficiencies of over 20%. Some solar chargers have built-in batteries that store energy, allowing you to charge your devices even when the sun isn't shining. Others charge your devices directly from the solar panels, which is less efficient but eliminates the need for a battery. The size and weight of a solar charger are important factors to consider, especially if you plan to use it for hiking or camping. Some solar chargers are designed to be foldable or rollable, making them easy to pack and carry. Solar phone chargers are becoming increasingly popular as people seek more sustainable and environmentally friendly ways to power their devices. The technology is constantly improving, with new and more efficient solar chargers being developed all the time. In the future, we can expect to see even more advanced solar chargers that are smaller, lighter, and more powerful. The sun is an inexhaustible source of energy, and solar phone chargers offer a convenient and sustainable way to harness that energy to power our lives.
How to Choose the Right Solar Phone Charger
With so many solar phone chargers on the market, it can be difficult to choose the right one for your needs. Here are some key factors to consider: Charging Capacity: The charging capacity of a solar charger is measured in watts. A higher wattage charger will generally charge your devices faster. Consider the size and power requirements of the devices you plan to charge. For smartphones, a 5-watt or 10-watt charger may be sufficient. For tablets or laptops, you may need a 15-watt or 20-watt charger. Portability: If you plan to use your solar charger for hiking or camping, portability is a key consideration. Look for a charger that is lightweight and compact. Foldable or rollable chargers are particularly convenient for travel. Durability: Solar chargers can be exposed to harsh weather conditions, so durability is important. Look for a charger that is made from durable materials and is water-resistant or waterproof. Battery Capacity: Some solar chargers have built-in batteries that store energy. These chargers can be useful for charging your devices at night or on cloudy days. However, chargers with batteries tend to be heavier and more expensive. Efficiency: The efficiency of a solar charger is measured by the percentage of sunlight that is converted into electricity. A more efficient charger will charge your devices faster in the same amount of sunlight. Look for chargers with high efficiency ratings. Price: Solar phone chargers range in price from a few dollars to several hundred dollars. Consider your budget and your needs when choosing a charger. Read reviews: Before you buy a solar charger, read reviews from other users. This can help you get a sense of the charger's performance and reliability. By considering these factors, you can choose the right solar phone charger for your needs and ensure that you have a reliable source of power wherever you go.
What if Your Solar Charger Still Doesn't Work?
Even after troubleshooting all the common issues, there's a chance your solar charger might still refuse to cooperate. Don't despair just yet! Let's explore some additional possibilities. Check for Compatibility Issues: Although rare, some devices might have compatibility problems with certain solar chargers. Consult the charger's documentation or the manufacturer's website for a list of compatible devices. Test with Multiple Devices: Try charging different devices with your solar charger to rule out the possibility of a device-specific issue. A power bank or a different phone can help isolate the problem. Reset the Charger: Some solar chargers have a reset button or a power cycle procedure. Consult the user manual for instructions on how to reset your charger. Inspect the Internal Battery (if applicable): If your solar charger has a built-in battery, it could be the source of the problem. Over time, batteries degrade and lose their ability to hold a charge. If you suspect a faulty battery, consider replacing it or contacting the manufacturer for assistance. Check the Warranty: Most solar chargers come with a warranty that covers defects in materials and workmanship. If your charger is still under warranty, contact the manufacturer for a replacement or repair. Seek Professional Help: If you've exhausted all other troubleshooting steps, it might be time to seek professional help. A qualified technician can diagnose the problem and recommend a solution. While it's frustrating when your solar charger isn't working, remember that there are always potential solutions. By systematically investigating the problem and considering all the possibilities, you can hopefully get your charger back up and running and enjoy the benefits of solar power.
Listicle of Common Issues and Quick Fixes
Here's a handy list of common solar phone charger issues and their quick fixes to get you back on track: 1.Issue: Charger not working in direct sunlight.Fix:Ensure the solar panels are clean, free of obstructions, and positioned at the optimal angle to the sun.
2.Issue: Charging is very slow.Fix:Check the charging cable for damage, use a high-quality cable, and keep your phone in the shade to prevent overheating.
3.Issue: Charger only works intermittently.Fix:Inspect the wiring and connectors for loose connections or frayed wires. Secure any loose connections and replace damaged wires.
4.Issue: Charger not charging a specific device.Fix:Check the device's compatibility with the charger. Some devices may require a specific voltage or amperage.
5.Issue: Charger's internal battery (if applicable) not holding a charge.Fix:Replace the battery or contact the manufacturer for assistance.
6.Issue: Solar panels appear damaged.Fix:Replace the solar charger. Damaged solar panels are difficult to repair.
7.Issue: Charger overheating.Fix:Keep the charger and your device in the shade while charging. Overheating can damage both the charger and your device.
8.Issue: Charger not turning on.Fix:Check the power switch or button. If the charger has a built-in battery, make sure it is charged.
9.Issue: Charger displaying an error message.Fix:Consult the user manual for troubleshooting instructions specific to the error message.
10.Issue: Charger worked before, but now it doesn't.Fix:Reset the charger or try charging a different device. It could be a device-specific issue. Keep this list handy for quick reference when troubleshooting your solar phone charger. With a few simple fixes, you can often resolve common issues and get your charger back to its optimal performance.
Question and Answer Section: Common Queries
Q: How much sunlight does a solar phone charger need to work effectively?
A: Solar phone chargers need direct sunlight to function efficiently. The more intense the sunlight, the faster your device will charge. Overcast days or shaded areas will significantly reduce charging speed or even prevent charging altogether.Q:Can I leave my phone charging in direct sunlight with a solar charger?
A: No, you should never leave your phone charging in direct sunlight, even when using a solar charger. Overheating can damage your phone's battery and reduce its lifespan. Keep your phone in the shade while it's charging.Q:How do I clean my solar phone charger?
A: Clean your solar phone charger with a soft cloth or brush and a mild soap and water solution. Avoid using harsh chemicals or abrasive cleaners, as these can damage the panels. Rinse the panels thoroughly with clean water to remove any soap residue.Q:What should I do if my solar phone charger isn't working, even in direct sunlight?
A: First, make sure the solar panels are clean and free of obstructions. Check the charging cable for damage and try using a different cable. Inspect the wiring and connectors for loose connections or frayed wires. If the charger has a built-in battery, make sure it is charged. If none of these steps work, the charger may be faulty and need to be replaced.
Conclusion of Troubleshooting Common Issues with Solar Phone Chargers
In summary, successfully using a solar phone charger requires understanding its limitations and employing proper techniques. Issues like insufficient sunlight, incorrect charging methods, and faulty equipment can all hinder performance. However, by regularly cleaning the panels, ensuring cable integrity, being mindful of your phone's battery health, and optimizing panel positioning, you can maximize charging efficiency. When problems arise, systematically check for the common culprits, and don't hesitate to consult the user manual or seek professional help. With the right knowledge and a little bit of effort, you can harness the power of the sun to keep your devices charged and stay connected, no matter where your adventures take you.